Strawberry Shortcake Icebox Cake
Uitgelicht onder: Dagelijkse bakcollectie
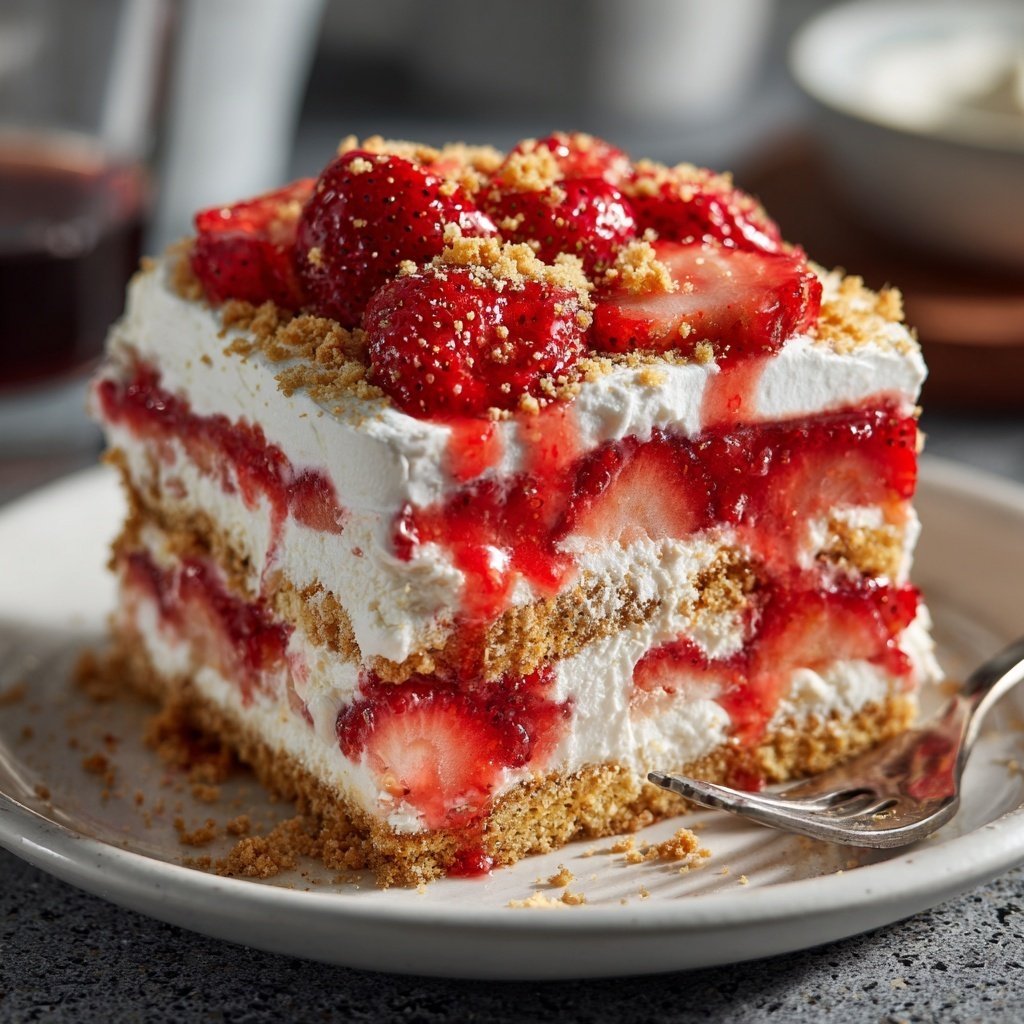
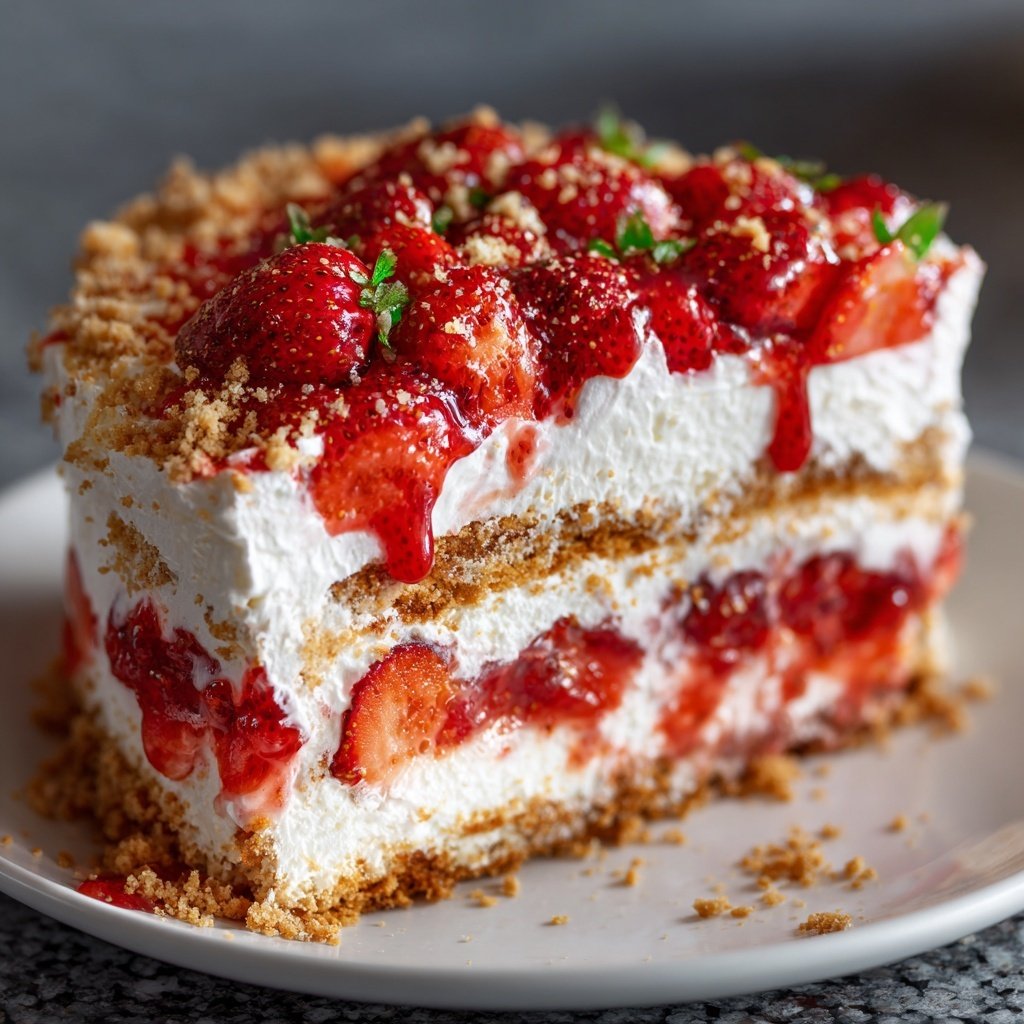
I absolutely love making Strawberry Shortcake Icebox Cake, especially during warmer months when strawberries are at their sweetest. This layered dessert combines a buttery cake with luscious whipped cream and fresh strawberries, making it a refreshing treat for any occasion. The best part? It requires no baking! Just a bit of assembly and some chilling time in the fridge, and you have a delightful dessert that’s sure to impress family and friends. Trust me, this recipe has become a staple in my household for its simplicity and incredible flavor.
When I first tried making this Strawberry Shortcake Icebox Cake, I was blown away by how simple yet delicious it turned out to be. The combination of fresh strawberries and whipped cream layered between soft cake makes for a wonderful summer dessert. I recommend using ripe strawberries for the sweetest flavor; I often pick my own from local farms to ensure they are at their best.
One unique tip I've learned is to let the cake chill overnight. This allows the flavors to meld beautifully and the cake to soften, turning into a blissfully creamy treat that practically melts in your mouth. Trust me, the wait is worth it!
Why You Will Love This Recipe
- Deliciously light and refreshing flavor
- No baking required makes it a breeze
- Perfect for summer gatherings and celebrations
Understanding Flavors and Textures
The combination of fresh strawberries and whipped cream creates a wonderful contrast of flavors in the Strawberry Shortcake Icebox Cake. The strawberries not only add sweetness but also provide a juicy burst that complements the airy, light texture of the whipped cream. I recommend using ripe strawberries for the best flavor, as their natural sweetness will enhance the overall taste of the dessert. Avoid berries that are overripe or mushy, as they can alter the cake's texture and presentation.
The cake layers are crucial in creating a solid foundation for this dessert. Using store-bought pound cake or angel food cake gives you a consistent texture that absorbs the juices from the strawberries and whipped cream without becoming soggy. If you prefer a more homemade touch, you can bake your own cake using a classic recipe; just ensure it's completely cooled before slicing to maintain its shape during assembly.
Assembly Techniques
When layering the cake, aim for even distribution of the whipped cream and strawberries. Start with a layer of cake at the bottom of a rectangular dish, followed by a generous spread of whipped cream. Then, add a liberal amount of sliced strawberries, ensuring each layer has a good balance of each component. My tip is to slightly press down on the layers as you assemble them; this helps the cake absorb the flavors effectively and sets it up for a delightful slice later.
As you assemble, keep in mind to leave the top layer primarily whipped cream, perhaps garnished with a few perfectly sliced strawberries for a beautiful presentation. This not only looks appealing but also helps to keep the strawberries from browning too quickly in the fridge. Once assembled, cover the dish tightly with plastic wrap to prevent any air from drying out the cake during the chilling process.
Ingrediënten
Ingredients
For the Cake Layers
- 1 box of store-bought pound cake or angel food cake
- 1 cup of heavy whipping cream
- 1/4 cup of powdered sugar
- 1 teaspoon of vanilla extract
For the Strawberry Filling
- 4 cups of fresh strawberries, hulled and sliced
- 1/4 cup of granulated sugar
Make sure all ingredients are fresh for the best flavor!
Bereidingswijze
Instructions
Prepare the Strawberries
In a bowl, combine the sliced strawberries with granulated sugar. Let them sit for about 10-15 minutes, allowing the strawberries to macerate and release their juices.
Make the Whipped Cream
In a separate bowl, beat the heavy whipping cream, powdered sugar, and vanilla until soft peaks form. Set aside.
Assemble the Cake
Slice the pound cake into even layers. Start layering in a 9x13 inch dish: place a layer of cake, spread a layer of whipped cream, and top with strawberries. Repeat until all ingredients are used, finishing with whipped cream and a few strawberry slices on top.
Chill the Cake
Cover the dish with plastic wrap and refrigerate for at least 4 hours or overnight to allow the cake to soak up the flavors.
Serve
Once chilled, slice the cake and serve it cold. Enjoy your delightful Strawberry Shortcake Icebox Cake!
Enjoy your delicious, no-bake dessert!
Professionele Tips
- For a more decadent version, add layers of chocolate ganache between the strawberries and whipped cream.
Storage and Make-Ahead Tips
The Strawberry Shortcake Icebox Cake is an excellent make-ahead dessert, as its flavors improve after chilling. You can prepare it up to 24 hours in advance, allowing the cake to soak up the strawberry juices for enhanced flavor. If you need to store leftovers, cover them well with plastic wrap to retain moisture and prevent any off-flavors from seeping in.
When it comes to freezing, this cake can be frozen, though I recommend enjoying it fresh for the best texture and flavor. If you must freeze, slice individual portions and wrap them tightly in plastic wrap, then store them in an airtight container. Thaw in the refrigerator before serving to maintain the best consistency.
Variations to Try
Feel free to get creative with the flavor profile of your Strawberry Shortcake Icebox Cake. You can substitute the strawberries with other berries, such as blueberries or raspberries, to create a mixed berry version. Additionally, adding a layer of lemon curd or a drizzle of chocolate ganache between layers can elevate the flavor and add more complexity.
For a dairy-free adaptation, you can swap the heavy cream with coconut cream, which whips up just as well but brings a tropical twist. Use a non-dairy cake substitute to maintain the icebox cake's integrity. Keep in mind that variations may slightly alter the chilling time or structure, so adjust instructions as necessary based on your ingredients.
Vragen Over Recepten
→ Can I use frozen strawberries?
While fresh strawberries are recommended for the best flavor, frozen strawberries can be used in a pinch. Just thaw and drain them before using.
→ How long can I store the cake?
The Strawberry Shortcake Icebox Cake can be stored in the refrigerator for up to 3 days, but it is best enjoyed within 24 hours for optimal freshness.
→ Can I make this dairy-free?
Yes! Use dairy-free cream alternatives and substitute the pound cake with a dairy-free version.
→ What can I serve with it?
This dessert pairs wonderfully with a scoop of vanilla ice cream or a drizzle of chocolate sauce for added indulgence.
Strawberry Shortcake Icebox Cake
Gemaakt door: Rachel Green
Recepttype: Dagelijkse bakcollectie
Vaardigheidsniveau: Easy
Eindportie: 8 servings
Wat je Nodig Hebt
For the Cake Layers
- 1 box of store-bought pound cake or angel food cake
- 1 cup of heavy whipping cream
- 1/4 cup of powdered sugar
- 1 teaspoon of vanilla extract
For the Strawberry Filling
- 4 cups of fresh strawberries, hulled and sliced
- 1/4 cup of granulated sugar
Stappen
In a bowl, combine the sliced strawberries with granulated sugar. Let them sit for about 10-15 minutes, allowing the strawberries to macerate and release their juices.
In a separate bowl, beat the heavy whipping cream, powdered sugar, and vanilla until soft peaks form. Set aside.
Slice the pound cake into even layers. Start layering in a 9x13 inch dish: place a layer of cake, spread a layer of whipped cream, and top with strawberries. Repeat until all ingredients are used, finishing with whipped cream and a few strawberry slices on top.
Cover the dish with plastic wrap and refrigerate for at least 4 hours or overnight to allow the cake to soak up the flavors.
Once chilled, slice the cake and serve it cold. Enjoy your delightful Strawberry Shortcake Icebox Cake!
Extra Tips
- For a more decadent version, add layers of chocolate ganache between the strawberries and whipped cream.
Voedingswaarde (Per Portie)
- Calories: 300 kcal
- Total Fat: 18g
- Saturated Fat: 10g
- Cholesterol: 55mg
- Sodium: 80mg
- Total Carbohydrates: 30g
- Dietary Fiber: 2g
- Sugars: 18g
- Protein: 3g